Physical Address
304 North Cardinal St.
Dorchester Center, MA 02124
Physical Address
304 North Cardinal St.
Dorchester Center, MA 02124
If you have a Surface RT (original), Surface 2, Nokia Lumia 2520 or other ARM device or system you have probably noticed that there is no obvious way to request help from another person and have them log in to assist you with a problem. Programs like Team Viewer require a program to be installed on your device, and this isn’t possible on Windows RT devices.
If you really need another person to assist you, there is indeed a way, although it is well hidden, and it requires a few steps. (Remember, only invite someone you absolutely trust, never a stranger or someone who calls you on the phone or emails you that there is something wrong with your computer as these unsolicited requests are always scams.)
Turn on Remote Assistance/Verify it is Turned on:
1. Swipe in from the right to display the Charms, then select the Search Charm.
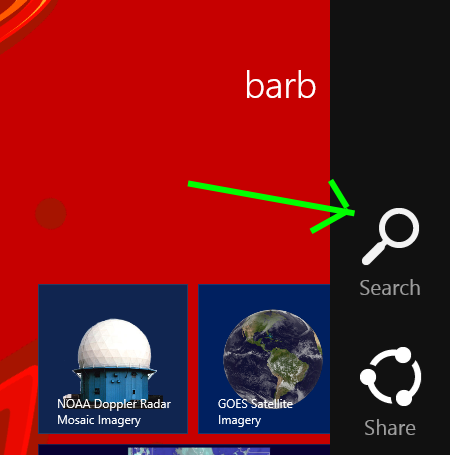
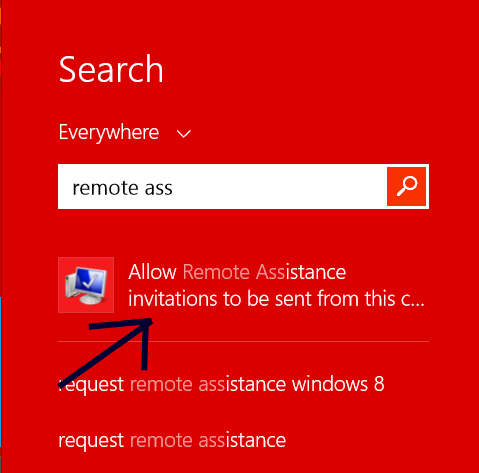
2. Start typing the words remote assistance and you should see “Allow Remote Assistance invitations to be sent from this computer” pop up. Tap to select this option.
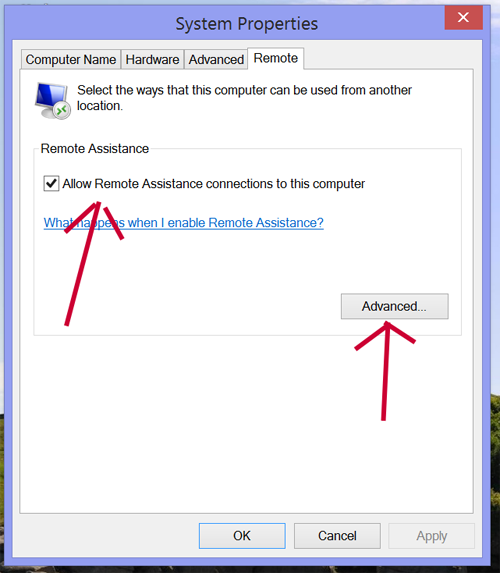
3. The desktop will open and display the System Properties window with the Remote tab already open. Verify there is a check mark in the Allow box (tap to place the check mark there if needed) and then tap Advanced.
4. In the Remote Assistance Settings Window, again verify the Allow box is checked and if needed, change the amount of time that invitations can remain open. If you are doing this in real time with a helper on the phone, you don’t need to do this and can just select OK in the preceding window.
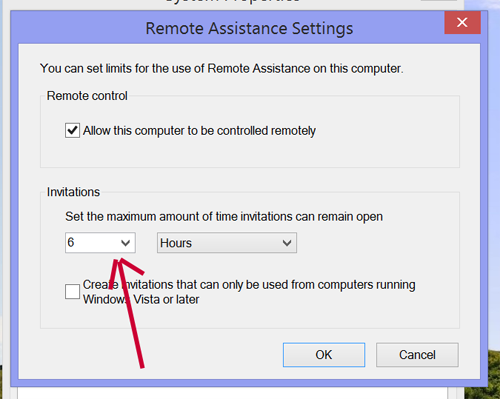
After performing the above steps, your tablet should remain set up to receive remote assistance and you would only need to revisit these steps if you need to change the amount of time for invitations to remain open.
Create a Remote assistance invitation to send to your helper:
1. From the Start Screen, swipe to display the Charms again and select Search.
2. Type the word help. Other characters will be filled in after the word help and you need to backspace over them/delete all but the word HELP.
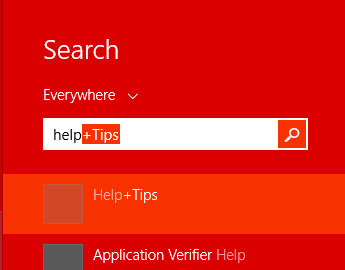
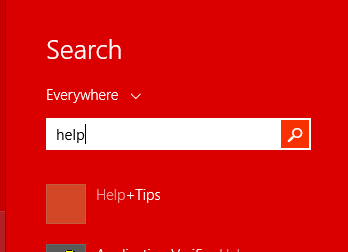
3. Once ONLY the word help is displayed, tap the Search icon/press Enter.
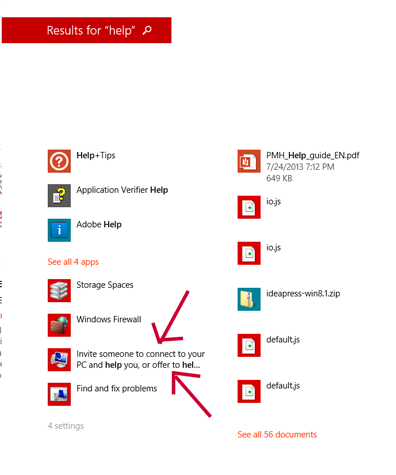
4. A window displays with multiple listings. Select Invite someone to connect to your PC and help you or offer…
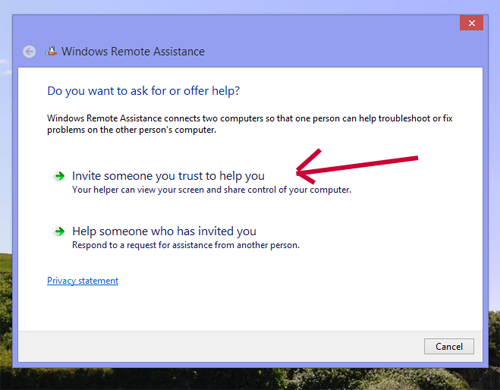
5. Windows Remote Assistance displays a choice. Select Invite someone you trust to help you.
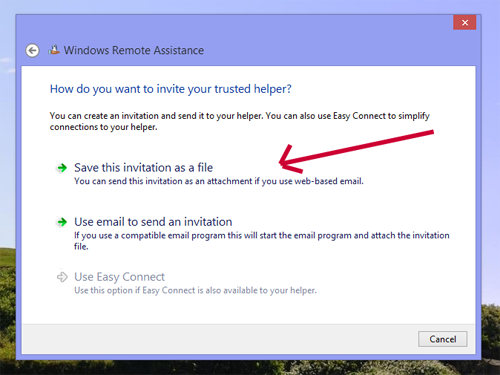
6. Next, select Save this invitation as a file.
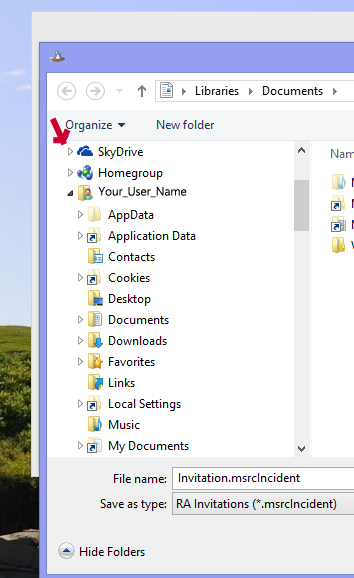
7. Windows File Explorer will open. By default, Windows should offer to save this in your Documents folder located on SkyDrive. You can skip to step 9 if your Documents folder is open and expanded. (If that folder does not display automatically, navigate to your SkyDrive and expand it to show folders if necessary by tapping the arrow to the right of the SkyDrive icon).
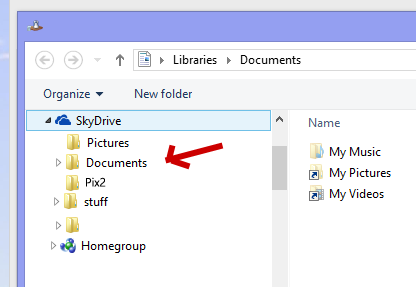
8. If Windows did not automatically open your Documents folder, and you navigated yourself, select the Documents folder
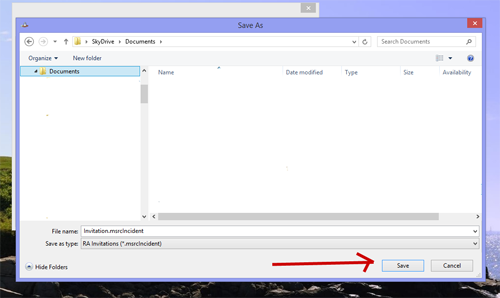
9. Now that you are in the Documents folder, select Save. This will save the file with the name Invitation.msrcIncident.
10. After you click save, a Windows will display with a password for the session.
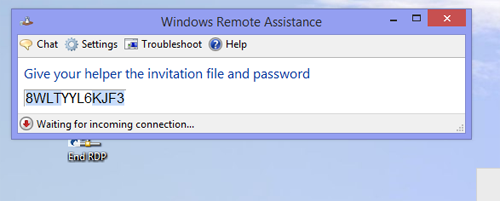
11. Open your email client (Windows Mail from the Start Screen or Outlook 2013 on the desktop) and attach the Invitation.msrcIncident file you saved in step 9 and address the email to the person who will be helping you and send the email. Call or text the person helping you with the password. It isn’t a good idea to include the password in the email with the invitation for security reasons. Do not close the Remote Assistance Window with the password.
12. Ideally, your helper should be on the phone with you when performing remote assistance so that you can discuss and troubleshoot. When this person connects, they will send a request for remote control which will pop up on your screen. You should select Yes to allow control.
13. When the session is finished, you can close any remaining Windows Remote Assistance windows. Go to your Documents folder and delete the invitation you created in step 9.