Physical Address
304 North Cardinal St.
Dorchester Center, MA 02124
Physical Address
304 North Cardinal St.
Dorchester Center, MA 02124

Every so often Microsoft launches a program that turns my head. This…

I’m often asked “where can I get a USB-C to HDMI cable…

My most successful Windows App, NOAA Doppler Radar Mosaic Imagery has had…
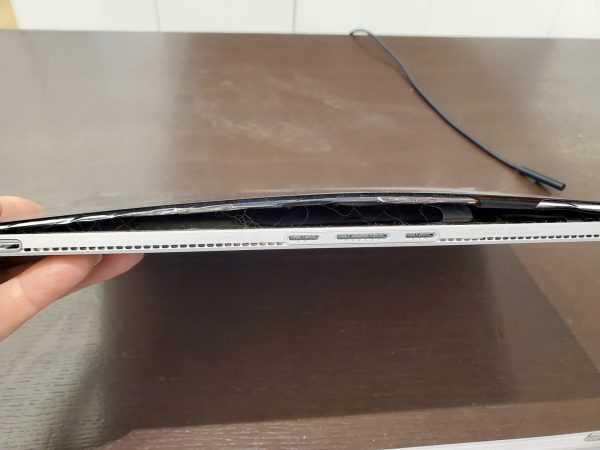
The bulging/expanded Surface battery issue has been growing. And it’s obvious that,…

A growing number of customers on Microsoft’s Answers Forum and Reddit are…
There are quite a few folks desperate for fixed Marvell Wi-Fi drivers…

Interesting post in Microsoft’s Surface Forum from an Enterprise customer who has…
I’ve been a big fan of Microsoft’s two factor authentication (2FA) client…
There’s a whole lot of Creatives in the Microsoft Surface Answers Forum…
Microsoft has published current pricing (in US Dollars) for those needing an…