Physical Address
304 North Cardinal St.
Dorchester Center, MA 02124
Physical Address
304 North Cardinal St.
Dorchester Center, MA 02124
Microsoft’s Windows 8.1 RTM Photo App displays photos stored on networked computers as long as the location is indexable after using the classic desktop Windows/file explorer to add that location to the Pictures Library. Linux powered, non Windows indexable NAS boxes, etc. can not be included, which is the same behavior as Windows 8.0 RTM.
Here are the steps you need to perform in order to show content from qualified network image folders in the Windows 8.1 Photos App.
Adding Top Level Folders (eg C:\Pix)
1. Enable Library View (and optionally, other advanced options) so that you can see the contents of your libraries easily in Windows file explorer.
a. Open Windows file explorer on the desktop and click or tap the View menu
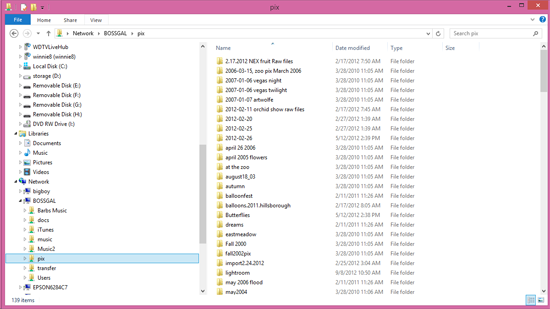
b. Click or tap the Navigation pane icon
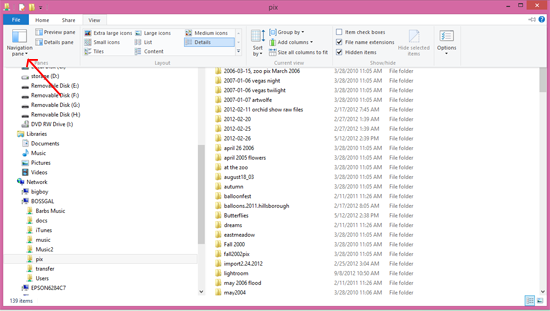
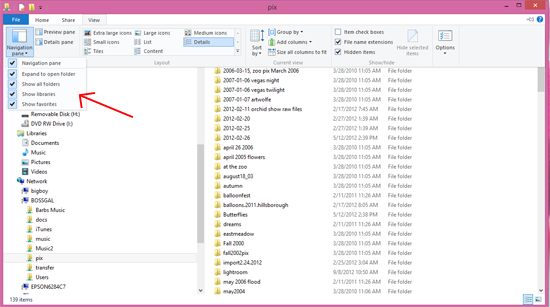
c. Check the Show libraries item by clicking or tapping it. It’s a good idea to enable the other options presented as well if not selected if you want a detailed view of the contents of your computer, networked computers and devices, etc.
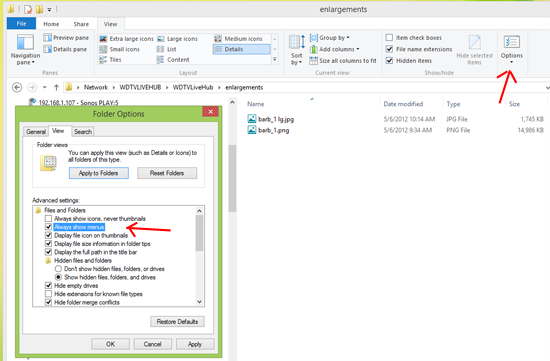
d. Good to have, but not needed to get started adding network locations: To always display more information in Windows file explorer default, select the Options menu, then select the View tab, then Always show menus and click or tap the Apply to Folders button.
2. Including a network location in your pictures library
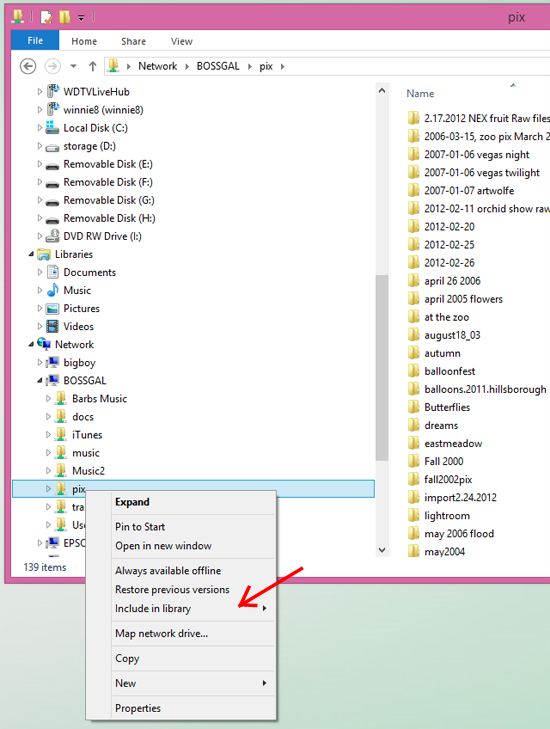
a. In the left pane, navigate to the folder you want to include in the library. In the example below, the folder named Pix on Bossgal is the target location.
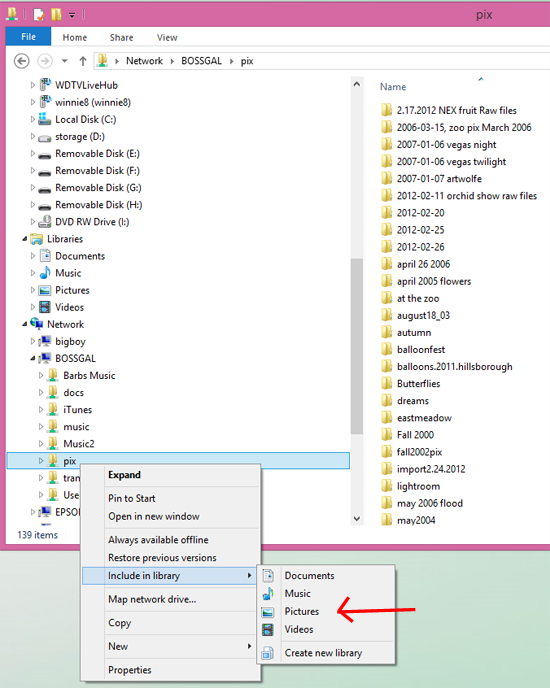
b. Right click or tap and hold to show the shortcut menu and then select Include in library
c. Select Pictures.
3. Confirm the content is added on the classic desktop
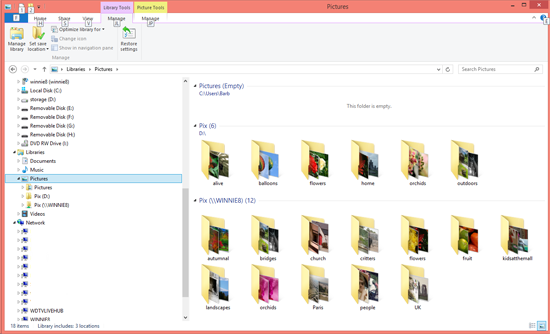
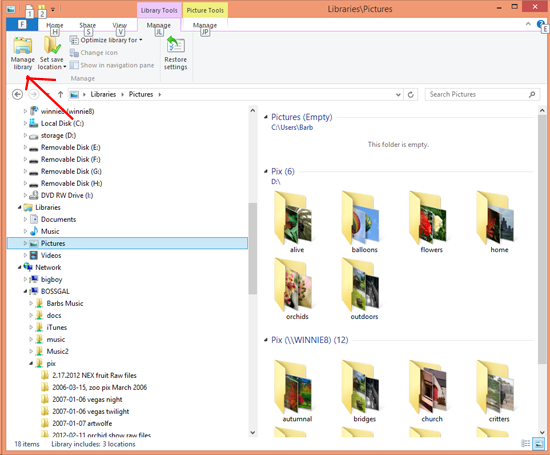
a. Select the Pictures library in the left pane (you previously should have enabled library view using the above instructions)
b. The network folders should now show in the right pane by network location. In the example below, the folder Pix from my Windows 8 computer Winnie8 is shown in the library. (It may take a few minutes for thumbnails to appear in non local locations.)
4. Confirm the content appears in the Windows 8.1 Photos App
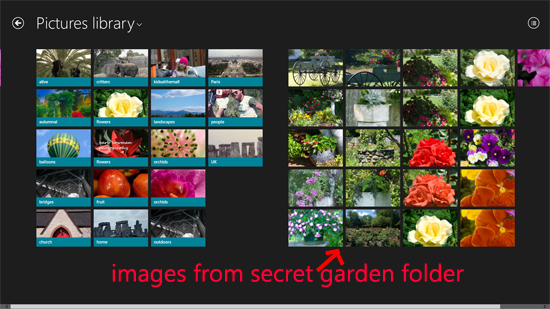
a. Launch the Photos App and verify that the content from the networked locations appears. (Note: the view is flattened, you cannot view by computer/device name, all content is presented on the Pictures Library main screen for This PC).
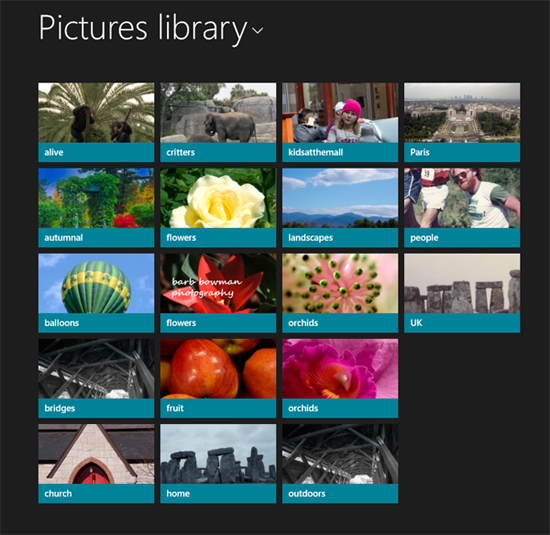
As you can see by the marked up screen shot below, network folders now display in the Windows 8.1 Pictures App.
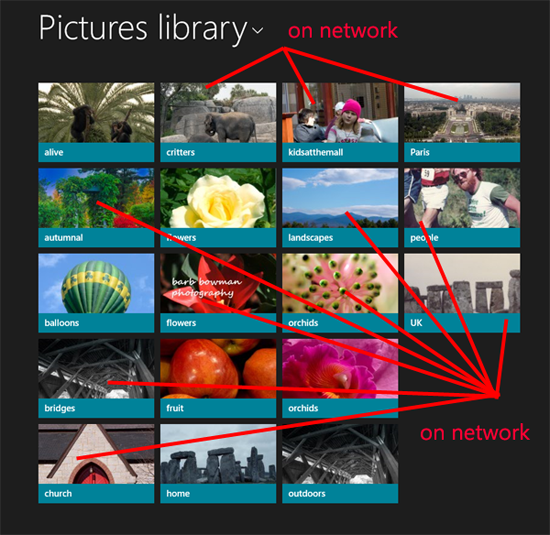
Note: After you get started and have added your first networked folder, you can also use the Manage Libraries function as described below. Note that the Start Screen Photos App handles conent from top level folder WITH subfolders differently than when you add a subfolder without adding the root folder as you will see below as well.
Adding Content from Network sub folders (eg, \\computername\folder\subfolder_name)
When you add a networked subfolder in Windows 8.1 but don’t add the root level folder above it, you can use the same process as above or the process below, and as you will see, the contents appear at the root level in the Start Screen Photos App and are not contained in a folder/collection.
To add contents from a folder not at the root level from a networked computer (a subfolder), these are the steps”
1. In Windows file explorer, select the Pictures Library, Library Tools, and then select the Manage Library icon as shown below.
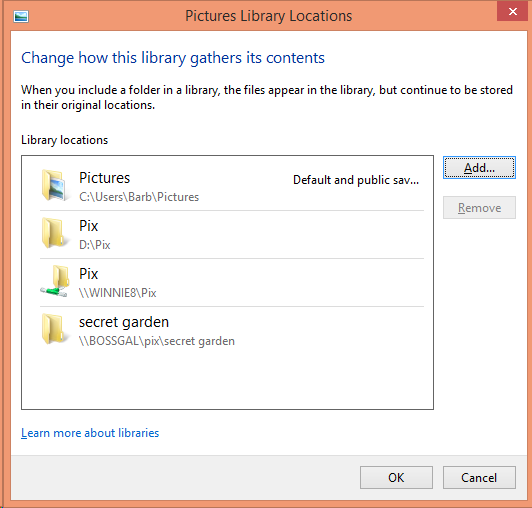
2. In the Pictures Library Locations window, select the Add button.
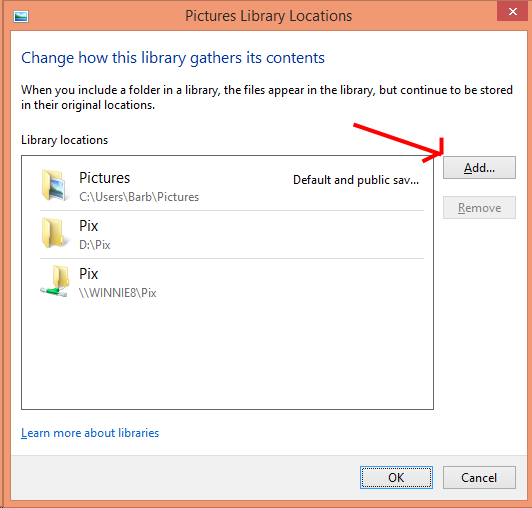
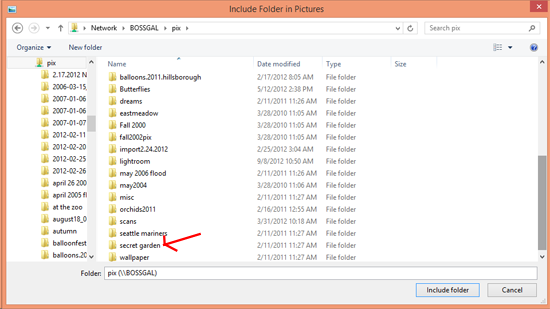
3. Browse to the sub folder you wish to include in the library (in the example below, pix is the root file, secret garden is the subfolder that I wish to add to the Library. Highlight the folder and then click or tap the Include folder button.
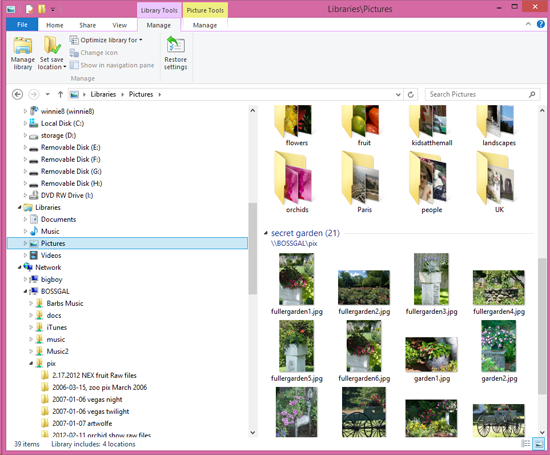
4. The contents of the subfolder are displayed in your library as in the example below.
5. You can continue to add content or close the Pictures Library Locations window.
6. When you are finished, the Photos App displays content you’ve added.
