Physical Address
304 North Cardinal St.
Dorchester Center, MA 02124
Physical Address
304 North Cardinal St.
Dorchester Center, MA 02124
Installing WordPress on Windows Home Server PP2 takes some concentration and some time, but isn’t that difficult. The key to success is having the right tools before you start this project.
You will need remote desktop access to your server (or any of the remote access add-ons that let you manipulate/add files and folders, access the Start menu and Administrative tools).
You need some software that you can download from the Internet.
1. Download mysql 5.1 Windows Essentials
from http://www.mirrorservice.org/sites/ftp.mysql.com/downloads/mysql/5.1.html
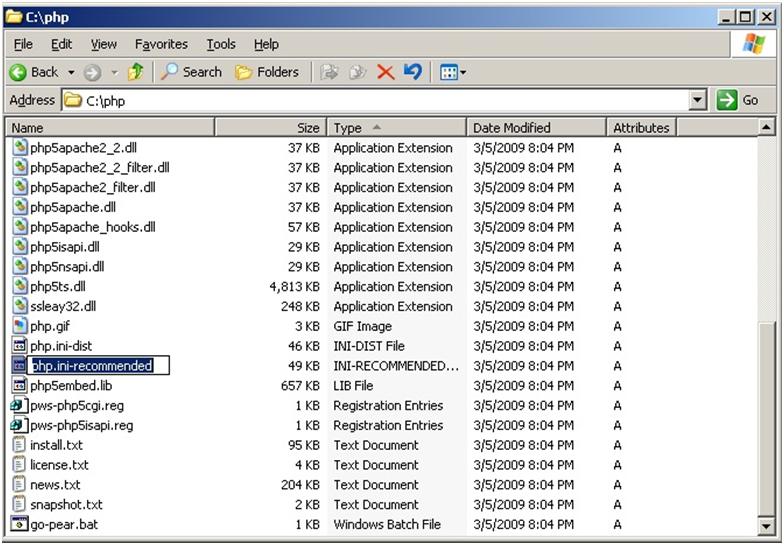
2. Php 5.2.9 zip package
http://us.php.net/downloads.php
3. 5.2.6 PECL package from
http://php.net/get/pecl-5.2.6-Win32.zip/from/a/mirror
(For me, the fastest download was selecting United States, Yahoo)
4. Download wordpress 2.7.1 from
http://wordpress.org/download/
Note, in the editing instruction below for the php.ini file, if I have used quotes ” “, these should be included in the edits you make. This does not apply to the registry modification.
4. Open the php.ini file you have now and uncomment cgi.force_redirect in php.ini and set it to 0
5. Find and change ‘upload_tmp_dir = ‘ and set it to ‘upload_tmp_dir = “C:\php\upload” ‘ and make the directory
6. Find and change ‘session.save_path’ to ‘session.save_path= “C:\php\sessions” ‘ and make the directory
7. Find and set the line ‘extension_dir’ to ‘extension_dir = “C:\PHP\ext” ‘.
8. Find the line that says ‘;error_log = filename’ and remove the comment semi-colon and change it to: ‘ error_log = “C:\php\errors.log” ‘
9. Uncomment these extensions:
extension=php_mysql.dll
extension=php_mysqli.dll
extension=php_gd2.dll
extension=php_gettext.dll
extension=php_mbstring.dll
extension=php_sockets.dll
extension=php_xmlrpc.dll
extension=php_zip.dll
10. Go to the Start menu > Control panel > System > Advanced Tab > Click “Environment Variables”.
11. Select Path and press Edit. Next add C:\PHP to it, preferably to the beginning (use a semi-colon to separate it from any entry that follows — ;)
12. Now run regedit.exe from a cmd prompt or the Run field
13. Add HKEY_LOCAL_MACHINE\SOFTWARE\PHP to the registry (edit/new/key), and under that add a new string value “IniFilePath” and set it to “C:\php” (right click/modify)
1. Use the typical installation and run the configuration wizard.
2. Choose the “Developer Machine.”

3. Select “Multifunctional Database” it.

4. If you are using WHS, install to the D:\ drive in the default location it selects. Or you can install to the default on C:\.

5. Select “Decision Support (DSS)/OLAP”

6. Leave TCP/IP Networking and Strict Mode enabled and check the box to enable the firewall exception.
7. Select the “Best Support for Multilingualism” option.
8. Install as a service and check the box to include the bin work directory in the Windows PATH

9. Enter a password. This is the password that will be for the “root” account, which has total access to every database. Save this password somewhere. I used the same password as I used for the Administrator on my WHS PPS box. No need to create an Anonymous account.
10. Execute the changes.
11. Reboot your WHS server to and then log in again via RDP, and verify that the MySQL service is up and running.
12. Create the directory blog under inetpub and unzip all files there
c:\inetpub\blog
13. After extracting the files, right click on the “blog” directly, and select “Properties”. Find the “Security” tab and click the “Advanced” button. Add the user “IUSR_SERVER”, replacing “SERVER” with whatever you named your WHS server. Iused SERVER2
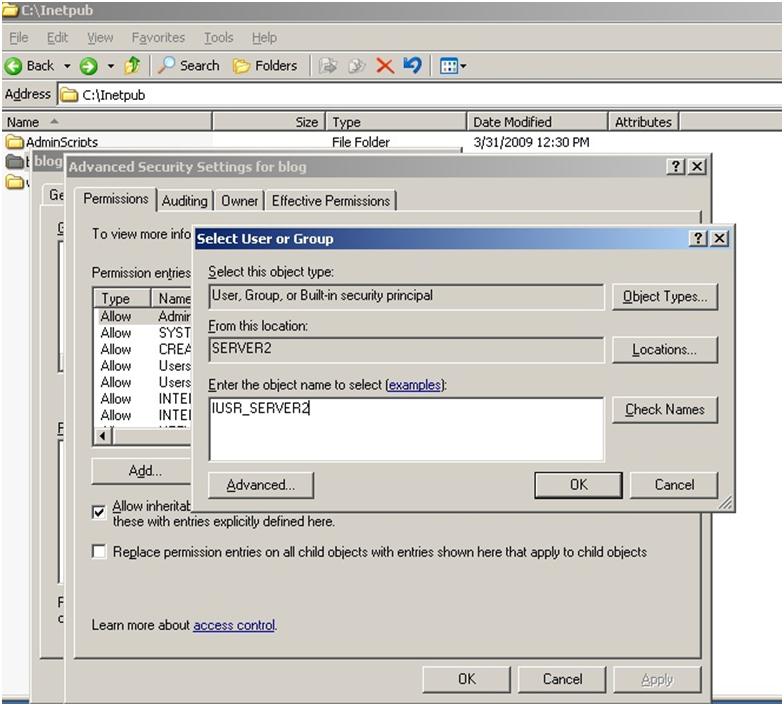
Give that user Full Control.

Enable “Replace permission entries on all child objects with entries shown here that apply to child objects”, and click okay and then yes.

•This will reset permissions on the files, and will revert back to being unchecked when it is done.
14. Next perform the same permissions change on the folder C:\PHP right click, then select “Properties”. Go to the Security Tab, and click on the “Advanced Button”. Click “Add…” and add the user “IUSR_SERVER” where “SERVER” is your WHS server’s name (same as you above). Specify Full control, and click Okay. Finally, enable “Replace permission entries on all child objects with entries shown here that apply to child objects”, and click okay/yes as you did above.
◦Note: The machine name is the name of the server originally. This may be SERVER, or in the case of the HP’s MediaSmart Server, it will be HPSERVER, making the account “IUSR_SERVER” or “IUSR_HPSERVER”. If it is not one of these two look for any account starting with “IUSR_” as this will be the correct account.
◦Note: As before, this will reset permissions on the files, and will revert back to being unchecked when it is done.
1. From the Start menu, navigate to “MySQL Command Line Client”. This requires you to enter a password. Enter the password you used when setting up MySQL.
2. Create the database that WordPress needs. Use the name “wordpress” for the database. You can use any name here. Note: In the commands that follow for the cmd line client, be sure to type in the semi-colons ;and the apostrophes ‘ as they are needed in the syntax. Press [enter] after the semi colon to execute and see the confirmation
mysql> create database wordpress;
you should then see:
Query OK, 1 row affected (0.01 sec)
3. Now that the database exists, you need to “use” that database andthen create a user specifically for WordPress to avoid using the root account (security, security, security!). I created the username and gave it permission to use the new database. I used the username “wpadmin” and the password “wppassword”. Here are the commands and the corresponding confirmations displayed in the cmd line client:
mysql> use wordpress;
Database changed
mysql>CREATE USER ‘wpadmin’@’localhost’ IDENTIFIED BY ‘wpadmin’;
Next, type these SQL commands and hit enter after each:
mysql>FLUSH PRIVILEGES;
mysql> GRANT ALL PRIVILEGES ON wordpress.* to wpadmin@localhost IDENTIFIED BY ‘wppassword’;
Query OK, 0 rows affected (0.01 sec)
4. This completes configuring the database, wordpress user account for the database and security. Write down all usernames and passwords you established. To quit the cmd line, type:
mysql>quit
1. From the Start menu, go to “Administative Tools” and open “Internet Information Services.”
2. Open “Websites”, and then find “Default Web Site.” Right click and open the “New” group and select “Virtural Directory.” Not Virtual Directory from file.

3. Type in the directory name where you to unzipped WordPress installation. I created a folder named blog, so this is what I typed in.
4. Click “Next” and set the path to “C:\inetpub\blog” or whatever name you used for this directory.
5. Click “Next”. Options for the new virtual directory will display. Select “Read“, and “Run scripts“.
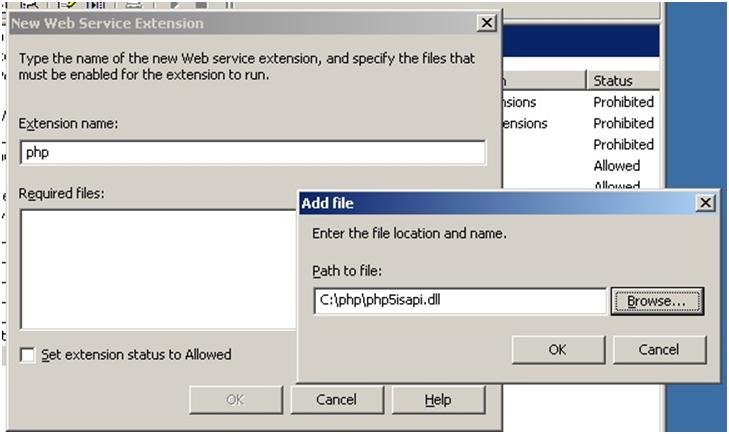
6. Right Click on Web Service Extensions located on the left side and choose Add a new web service extension. Enter in php and click add.

7. Browse to C:\php\php5isapi.dll. Also, be sure to set extension status to allow. Click “Okay”.
8. Right Click on websites and choose properties. Select the Documents tab and add index.php as a start document.

9. Next, select the Home Directory Tab and click Configuration. Go to the mappings tab and click on add. Enter .php for the extension and enter C:\php\php5isapi.dll in the executable textbox. Verify that the setting all verbs is checked and keep clicking ok.

Note: ◦if prompted to apply changes to home, remote, and UPnP DO NOT apply changes to “Remote”, “Home”, or “upnp” directories.
10. Select the Home Directory tab and Verify “RemoteAccessAppPool” is selected, and not “DefaultAppPool”.

11. Log off from the RDP sessions on your WHS server
Configure your new blog from any machine on your network or the internet by accessing
1. Open IE and navigate to http://yourcustomedomain.homeserver.com/blog
2. Error will display “no wp-config.php file”

3. Click the radio button to create the file and follow the prompts and then click Run the Install
4. Give your blog a title, specify the username, etc. and then click Install WordPress
5. Write down the password/copy to clipboard, you will need it to login to configure the rest of the blog features. And you can change this password and add users/authors/etc. when you login.
Have fun. You’re on your own from here!